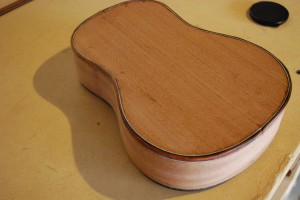
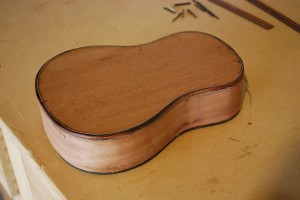
Today I spent a little more time with the side bending iron in my work to get the wood bindings on Dad’s ukulele. I was pleased to find out that the binding that I had bent stayed pretty much in the same bent position as I left it, but I still re-soaked it so I could work it a little more. I got things as far as I could work it, the wood was starting to scorch and in some cases cracked. I decided it was time to attempt gluing these bindings on, and it became quickly obvious that things were going to be harder than I expected when I superglued my fingers to the binding on about three occasions.
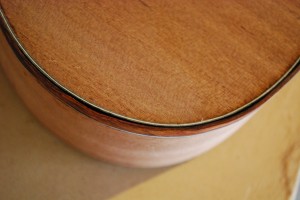
Bending wood bindings is hard. As you can see from the pictures, it came out really well with a few notable exceptions. As the wood dried, I got some gaps between the edge of the binding and the body. The kerfing went on so well that I went ahead and put it on the entire body at once. I was very pleased with how this worked, despite the fact that I soaked some of the strips too long and they delaminated. I did get better as I worked the wood bindings, the second half was much better than the first.
So far my favorite tool is the hand-held scraper. I used it to even out the binding edges along the body of the ukulele, and it makes these satisfying tiny curls of wood as it removes a small amount of material each time. More about that later. The solution I am going to use for the gaps in the binding is one that my Dad recommended, and my grandpa used to use on his bowl inlays. He would take a pile of sawdust of the same type of wood and mix it with wood glue until it is a paste, and then use that paste to fill the gaps. With any luck, this will fill the gaps satisfactorily and I can move on with finishing.
I wish I could say I was more satisfied with the results, but the wood binding is tough to work with and very hard to make look perfect. It’s all a learning experience though! More soon!


Related Articles
No user responded in this post